
SITEMAP
Terraform Backend in Azure Storage
Terraform supports multiple backend options (local or remote) for storing the Terraform state file, each with its benefits and drawbacks. Terraform uses a backend called local by default. The local backend type stores the state as a local file on disk. Remote backends refer to any non-local backend, e.g., Terraform Cloud, AWS S3, Azure Storage, Google Cloud Storage, etc.
The article presents the basic pipeline that deploys the Azure Storage Blob Container to store the remote Terraform Backend. The Azure DevOps pipeline must access the Terraform state file(s). The pipeline could do that in different ways. From a high-level perspective, we could think about public access (over the Internet and leveraging the Public Endpoint) or private access (utilizing the Private Endpoint).
The article focuses on the Public Endpoint protected by the Azure Storage Networking Firewall feature. Other security mechanisms, such as Azure Storage keys, Shared Access Signatures (SAS), or Azure Entra authentication, could also be leveraged, but the article does not cover them.
The article will present how to allow the Azure DevOps Pipeline to connect with the Azure Storage Blob Container using a Private Endpoint and Self-hosted Azure DevOps Agent.
Pre-Task: Azure DevOps Repo and Azure Storage creation
Let’s start by creating the Azure DevOps Project and Git Repo to host the Pipeline(s) and the Azure Storage Blob Container, which will host our Terraform state file. I am going to use Terraform to do that. The Terraform State file will be placed in Terraform Cloud (you could store the state anywhere or even create all the components “manually”).
The structure of my Terraform files:
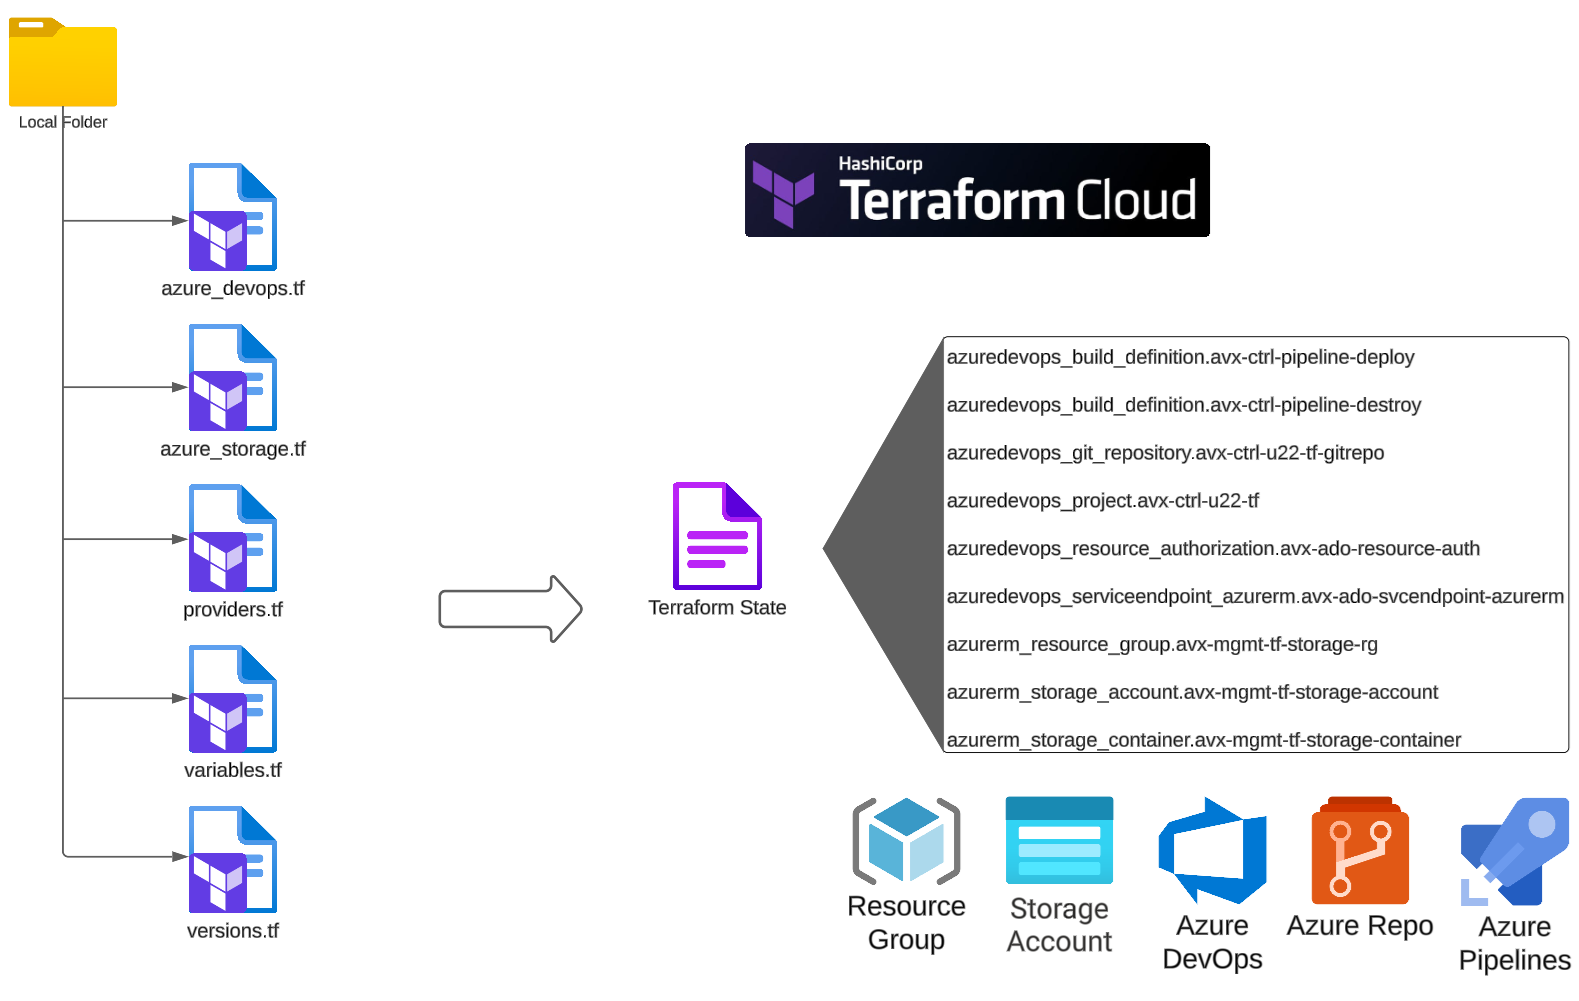
The azure_devops.tf file
The azure_devops.tf file contains a few resources: Project, Repo, Build, Service Endpoint:
					# Create a Project in your Organization
# You must have a Personal Access Token
resource "azuredevops_project" "avx-ctrl-u22-tf" {
  name               = "Aviatrix-Ctrl-U22-TF"
  description        = "Project that contains Aviatrix Controller"
  visibility         = "private"
  version_control    = "Git"
  work_item_template = "Basic"

  features = {
    "testplans"    = "disabled"
    "artifacts"    = "disabled"
    "boards"       = "disabled"
    "repositories" = "enabled"
    "pipelines"    = "enabled"
  }
}

# Repository that contains code for Aviatrix Controller and Copilot
resource "azuredevops_git_repository" "avx-ctrl-u22-tf-gitrepo" {
  project_id = azuredevops_project.avx-ctrl-u22-tf.id
  name       = "Aviatrix-Mgmt-Git-Repo"
  initialization {
    init_type = "Clean"
  }
  lifecycle {
    ignore_changes = [
      initialization,
    ]
  }
}

resource "azuredevops_build_definition" "avx-ctrl-pipeline-deploy" {
  project_id = azuredevops_project.avx-ctrl-u22-tf.id
  name       = "avx-ctrl-pipeline-deploy"

  ci_trigger {
    use_yaml = true
  }

  repository {
    repo_type   = "TfsGit"
    repo_id     = azuredevops_git_repository.avx-ctrl-u22-tf-gitrepo.id
    branch_name = azuredevops_git_repository.avx-ctrl-u22-tf-gitrepo.default_branch
    yml_path    = "azure-pipelines.yml"
  }

}

resource "azuredevops_build_definition" "avx-ctrl-pipeline-destroy" {
  project_id = azuredevops_project.avx-ctrl-u22-tf.id
  name       = "avx-ctrl-pipeline-destroy"

  ci_trigger {
    use_yaml = true
  }

  repository {
    repo_type   = "TfsGit"
    repo_id     = azuredevops_git_repository.avx-ctrl-u22-tf-gitrepo.id
    branch_name = azuredevops_git_repository.avx-ctrl-u22-tf-gitrepo.default_branch
    yml_path    = "azure-pipelines-destroy.yml"
  }
}

resource "azuredevops_serviceendpoint_azurerm" "avx-ado-svcendpoint-azurerm" {
  project_id                             = azuredevops_project.avx-ctrl-u22-tf.id
  service_endpoint_name                  = "AzureRM Service Endpoint for Aviatrix deployment"
  service_endpoint_authentication_scheme = "ServicePrincipal"
  azurerm_spn_tenantid                   = "<Your-Tenant-ID>"
  azurerm_subscription_id                = "<Your-Subscription-ID>"
  azurerm_subscription_name              = "<Your-Subscription-Name>"
}

resource "azuredevops_resource_authorization" "avx-ado-resource-auth" {
  project_id  = azuredevops_project.avx-ctrl-u22-tf.id
  resource_id = azuredevops_serviceendpoint_azurerm.avx-ado-svcendpoint-azurerm.id
  authorized  = true
}
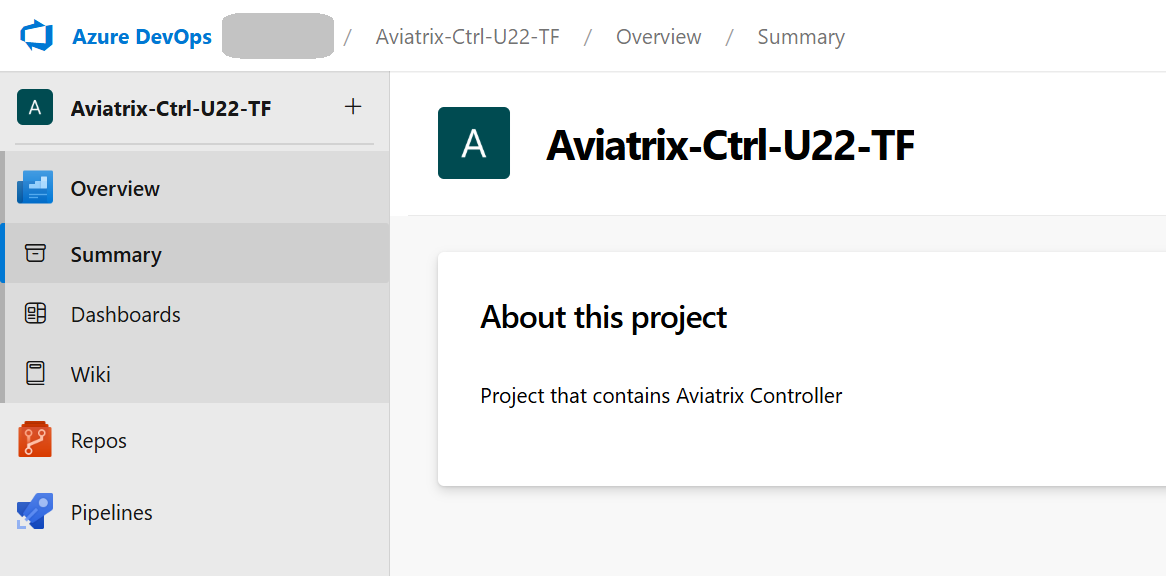
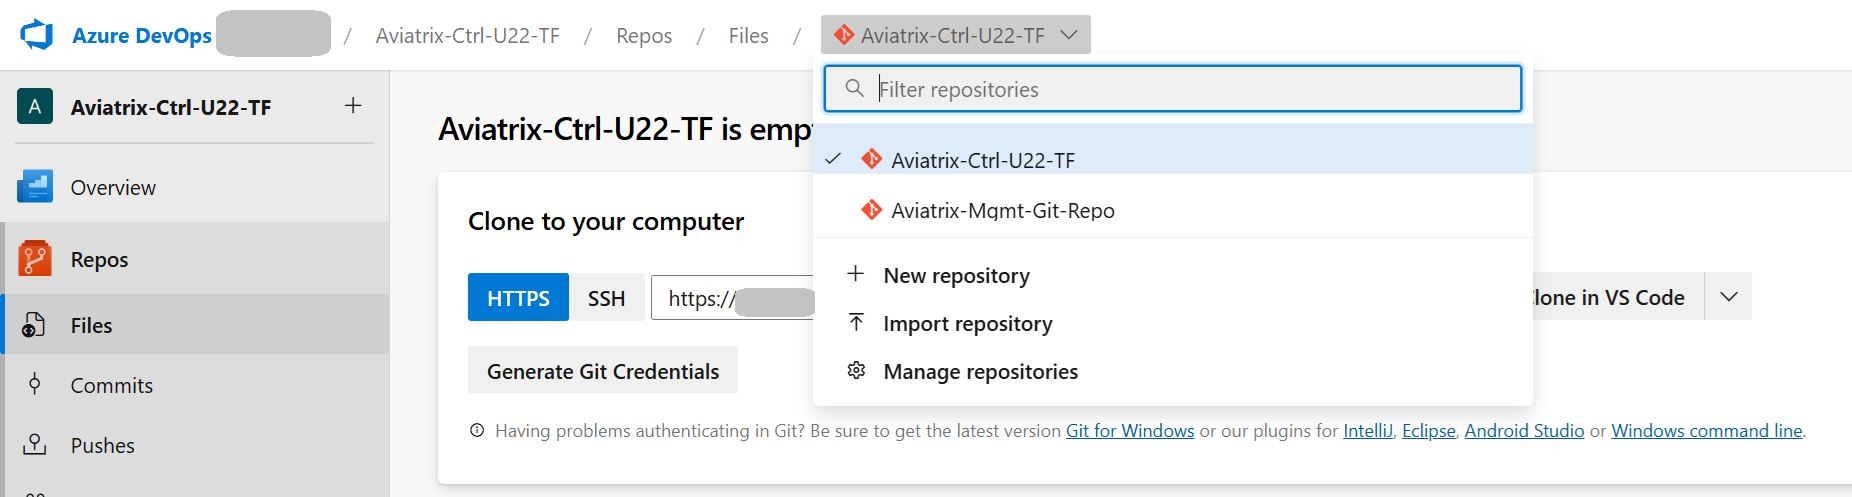
The new Project with Repos and Pipelines enabled:
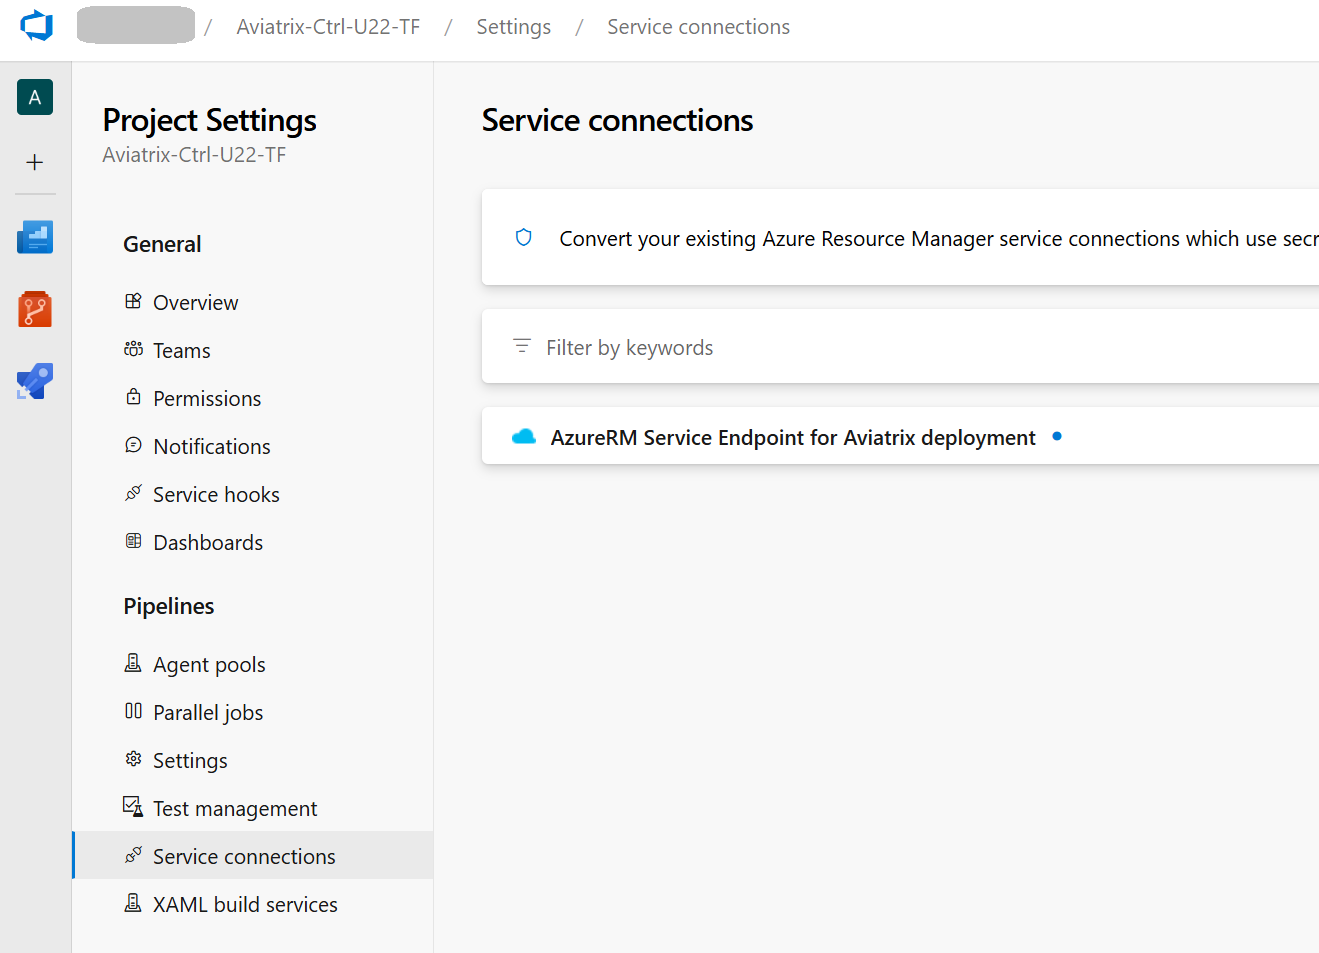
The Service Endpoint is there:
Please note that when you create a new Project, Azure DevOps will automatically create a Repo (with the Project name) for you. This is the reason we can see two Repos (the one created automatically and the one created by use through TF):
The azure_storage.tf file
The azure_storage.tf file contains resources for the Resource Group, Storage Account, and the Container. For now, I will restrict access to the Storage Account only to my Public IP address (I do not want my Terraform State file to be Public).
					# Create a Storage Account Container for Azure DevOpS Pipeline TF backend
resource "azurerm_resource_group" "avx-mgmt-tf-storage-rg" {
  name     = "avx-mgmt-storage-rg"
  location = "westeurope"
}

resource "azurerm_storage_account" "avx-mgmt-tf-storage-account" {
  name                     = "avxmgmttfstorageaccount"  # name can only consist of lowercase letters and numbers, and must be between 3 and 24 characters long
  resource_group_name      = azurerm_resource_group.avx-mgmt-tf-storage-rg.name
  location                 = "westeurope"
  account_tier             = "Standard"
  account_replication_type = "LRS"   # LRS - Locally Redundant Storage is ok for Test/Non-Prod Storage Account

  network_rules {
    default_action             = "Deny"
    ip_rules = ["<your-Public-IPs>"]
  }
}

resource "azurerm_storage_container" "avx-mgmt-tf-storage-container" {
  name                 = "avx-mgmt-tf-storage-container"
  storage_account_id   = azurerm_storage_account.avx-mgmt-tf-storage-account.id
}
The result:

The provider.tf, variables.tf, and versions.tf files
The content of the remaining files is presented below.
The providers.tf file:
					provider "azurerm" {
  features {}
}

provider "azuredevops" {
  org_service_url = var.ado_org_service_url
}
The variables.tf file (of course, you could use more variables for different DevOps Project and Repo, and Azure Storage arguments):
					variable "ado_org_service_url" {
  type        = string
  description = "Organization Service URL"
  default     = "https://dev.azure.com/<your-org>"
}
The versions.tf file:
					terraform {
  required_providers {
    azuredevops = {
      source  = "microsoft/azuredevops"
      version = ">=0.1.0"
    }

    azurerm = {
      source  = "hashicorp/azurerm"
      version = ">= 2.39"
    }
  }

# Backend for TF STATE FILE - only for Aviatrix Controller/Copilot
  cloud {
    organization = "<Your-TF_Org>"

    workspaces {
      name = "<Your-workspace>"
    }
  }
}
Azure DevOps Project caveats
Azure DevOps Project Service connection (endpoint). We have created the Service endpoint with Autnetication Scheme = Service Principal. If you want to follow the latest recommendation, you can leverage Workload identity federation instead.
Azure DevOps Pipeline Authorization resource. This resource will be deprecated and removed in the future. Please use `azuredevops_pipeline_authorization` instead.
Azure Storage caveats
Storage Account Replication Type. The Storage Account created by our code is of Replication Type = LRS (Locally Redundant Storage). It is enough for Test/Non-Prod environments. Based on the criticality of the data, availability requirements, and budget considerations you could consider using a different type.

Storage Account Access. The Storage Account we created is accessible from the public internet. We have created the Network Rules to control access and protect it. However, there are some important topics to consider:
- Azure DevOps Microsoft-hosted Agents are using different Public IP addresses. Tons of IP addresses. These addresses are specific to Azure geography. Ideally, the Agents should run in the Azure Geography of your Azure DevOps Organization. https://learn.microsoft.com/en-us/azure/devops/pipelines/agents/hosted?view=azure-devops&tabs=yaml#networking
- You can download (there is no API) the list of IP addresses used by Microsoft Services here (the ones used by Azure Agents are under AzureCloud sections): https://www.microsoft.com/en-us/download/details.aspx?id=56519
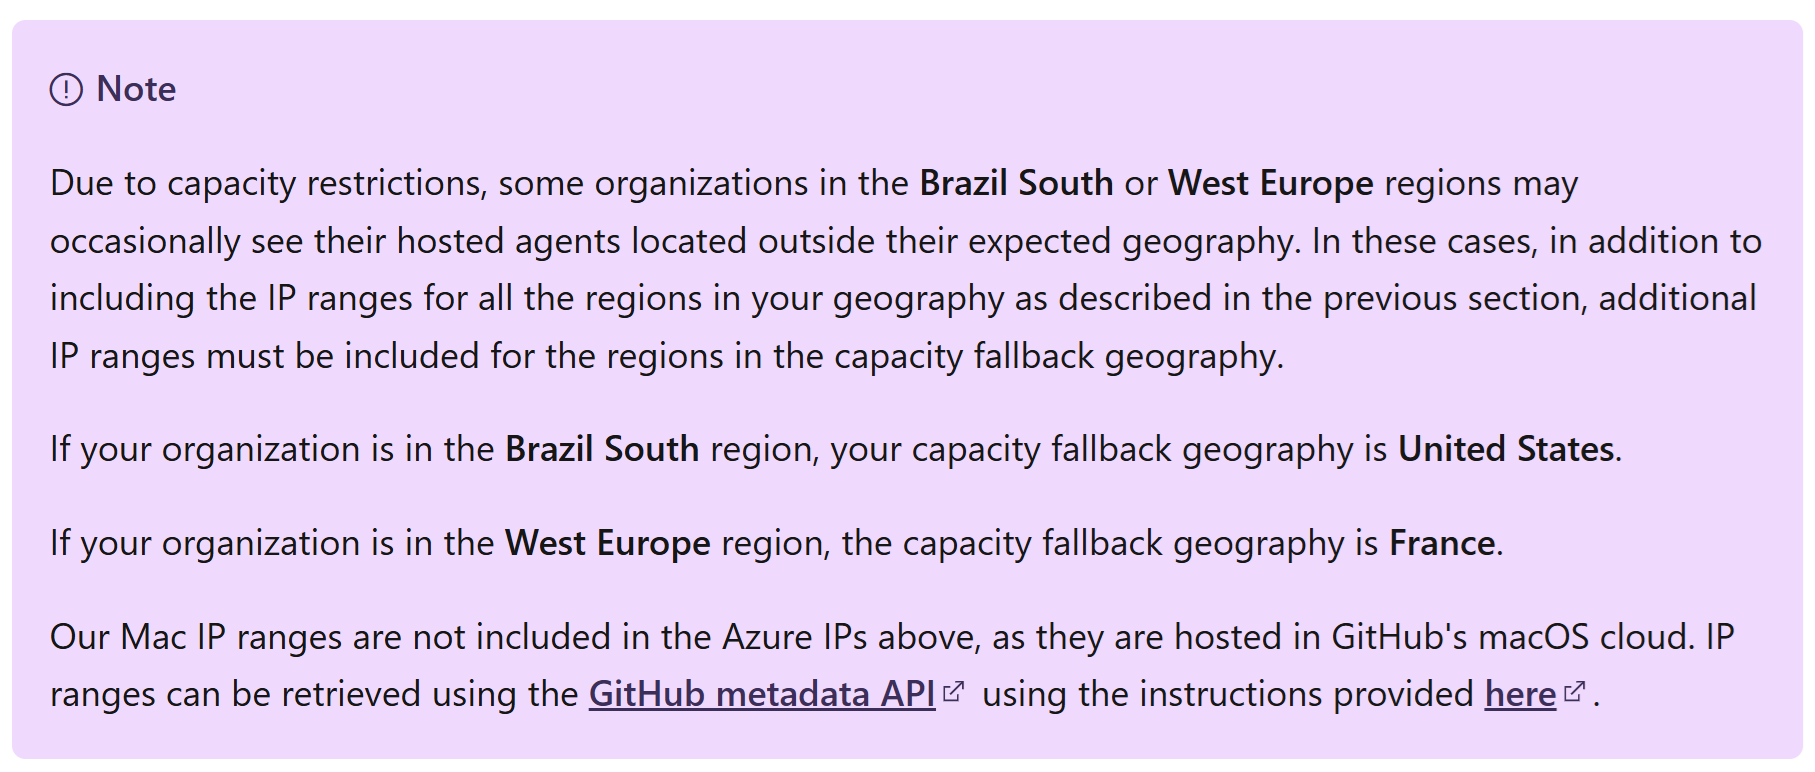
- But it could happen (see the Note above taken from the Microsoft webpage) that your Pipeline will leverage Agents from other Regions due to contention and resource utilization. You could think, “OK, I will also add IP addresses from other Regions.” But no, you cannot do that. The Azure Storage Network Firewall is limited to 400 rules only. If you look at the list of IP addresses, you can see that this limit is OK for one Region, but it is already too low for two Regions. Based on my tests, the Microsoft-hosted Agents used by my Pipeline were assigned the IP addresses from 3 different Azure Regions: 10 times from North Europe, 6 times from West Europe, and 3 times from Central France. Adding hundreds of IP prefixes to the Network Firewall might not always be a valid solution.
Some other solutions could be:
- Get the Microsoft-hosted Agent’s IP every time the Pipeline runs and update the Storage Account Network Firewall rule (please notice that each Pipeline Stage leverages a different Agent, so your Pipeline could use multiple Agents and different Public IPs). <- This is the solution I will present below in this blog article.
- Use self-hosted Agents (with a Static/fixed Public IP). The Storage Account will use a public endpoint.
- Use self-hosted Agents and Service Endpoints. The Storage Account still uses a public endpoint, but we limit access to authorized VNETs.
- Use self-hosted Agents and Private Endpoints. The Private Endpoint will use a dedicated private IP address in our VNET.
Creating Azure Pipelines for your environment deployment
After applying the code above, we are ready to go with the central part: Azure Pipelines for deploying our infrastructure. My infrastructure is the Aviatrix Controller and CoPilot, created in a dedicated VNET.
There are two YAML files with the Azure Pipelines:
- azure-pipelines.yml – the pipeline to create all the resources (Resource Group, VNET, Subnet, NSG, VM instances and so on). It executes terraform init, terraform plan, terraform apply commands.
- azure-pipelines-destroy.yml – the pipeline to destroy the entire infrastructure. It executes the terraform destroy command.
The pipeline will use the following Terraform files to create the Resources:
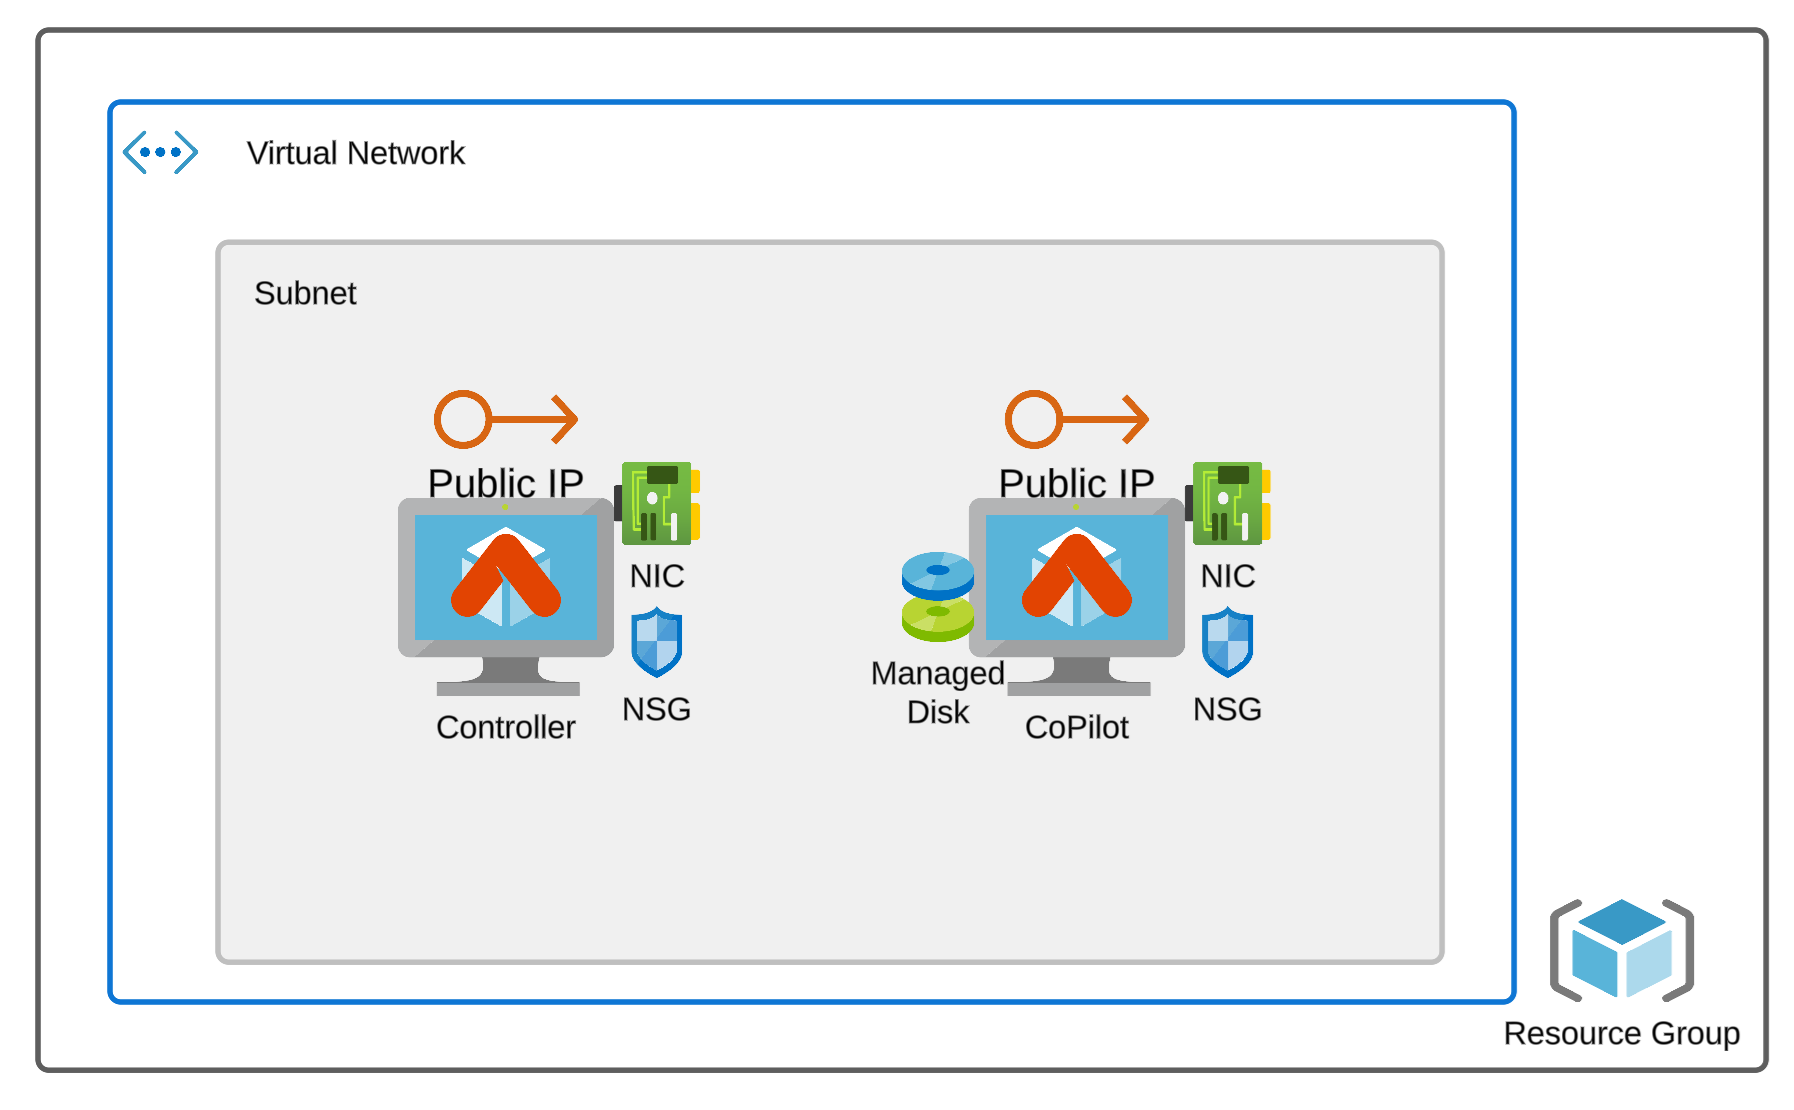
- main.tf – creates Resource Groups, VNET, Subnet, NSGs (one for the Aviatrix Controller and the other one for the Aviatrix CoPilot), Public IPs (one for the Controller and the other one for the CoPilot), NICs, NIC-associations, Azure Linux VM instances, managed disk and managed disk association for the Aviatrix CoPilot.
- outputs.tf – lists the Public and Private IPs assigned to the Aviatrix Controller and CoPilot VM instances.
- providers.tf – only azurerm provider is used
- variables.tf – defines all the variables
- versions.tf – specifies the Terraform state file to be stored in the Azure Storage Container we created in Part #1
Additionally, all the values for the variables are specified within the file:
- terraform.auto.tfvars
You can access my GitHub Repo to get all the files: https://github.com/JakubD-AVX/pipeline-terraform-backend-in-azure-storage-firewall-rule
This is how your Repo should look like:

And the Pipelines:

Prerequisite - Subscribe to Azure Marketplace offering
Please remember that to deploy the Aviatrix Controller and the Aviatrix Copilot, you must subscribe to the respective Azure Marketplace offerings. Before running the pipelines please execute the following Azure CLI commands:
For the Aviatrix Controller:
az vm image accept-terms --urn aviatrix-systems:aviatrix-controller:aviatrix-controller-g3:latest
For the Aviatrix CoPilot:
az vm image accept-terms --urn aviatrix-systems:aviatrix-copilot:avx-cplt-byol-02:latest
Azure Deploy-Pipeline Structure
There are plenty of Terraform resources deployed by the pipeline:
- Resource Group
- VNET with Subnet
- 2x NSGs
- 2x Public IPs
- 2x NICs
- 2x VM instances (Aviatrix Controller and Aviatrix CoPilot)
- Managed DIsk (for CoPilot)
The Deploy-Pipeline consists of three Stages and several Tasks. Each Stage is run by a different Agent (and different Public IP).
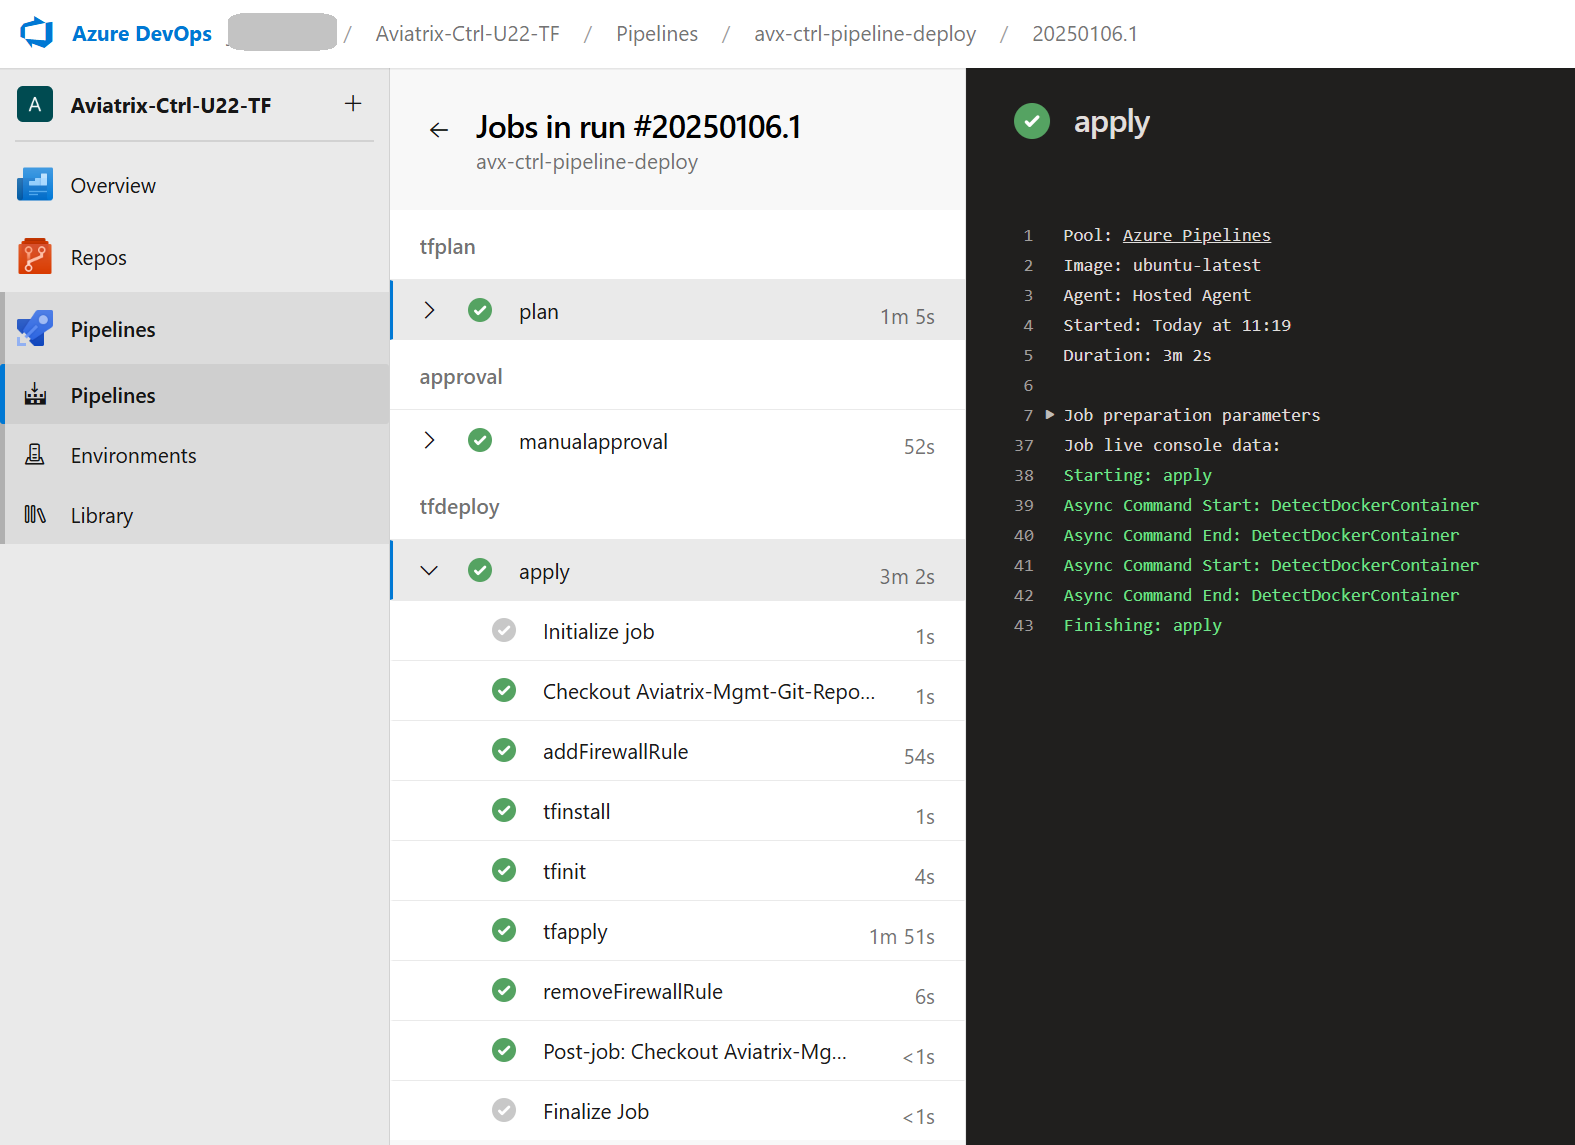
There are three things related to Pipeline that are worth discussing:
- Adjusting firewall Network Rules (of Azure Storage)
- Sleep command used by the pipeline
- Manual Approval task
Adjusting Firewall Network Rules for every Public IP used by the Agent
As mentioned above (in the Azure Storage Caveats section), the Azure Storage that hosts the Terraform State leverages the Azure Storage Public Endpoint. It means it is exposed to the Internet. However, I used Firewall network rules (of the Azure Storage) to allow only the legitimate (specified by me) Public IPs to access my Storage Account Blob Container.
Of course, enabling access for all Public IPs (or having a rule with a 0.0.0.0/0 IP Range) is not a secure option.
Adding all the Microsoft-hosted Agents’ IP addresses to the list is impossible because there could be only up to 400 rules (and the agents use many more Public IPs).
The solution used by my pipeline is to adjust the list with the Agent’s IP address every time the Tasks of a specific Stage start and remove the IP as the last Task of the Stage. It is necessary to update the Network Rules for Azure Storage Firewall for every Stage because each Stage is executed by a different Agent (with a different Public IP address).
The task that modifies the Firewall Network Rules:
					- task: AzureCLI@2
            displayName: addFirewallRule
            inputs:
              azureSubscription: 'AzureRM Service Endpoint for Aviatrix deployment'
              scriptType: 'bash'
              scriptLocation: 'inlineScript'
              inlineScript: |
                AGENT_IP=$(curl https://api.ipify.org/?format=json)
                GET_IP=$(echo $AGENT_IP | jq -r '.ip')
                echo "The IP address used by the Agent is  $GET_IP"
                az storage account network-rule add -g $(bckstorageresourcegroup) --account-name $(bckstorage) --ip-address $GET_IP
                echo "Updating Firewall rule with IP $GET_IP and waiting for 25 seconds"
                sleep 25
                echo "Wait-period has been finished. Resuming..."
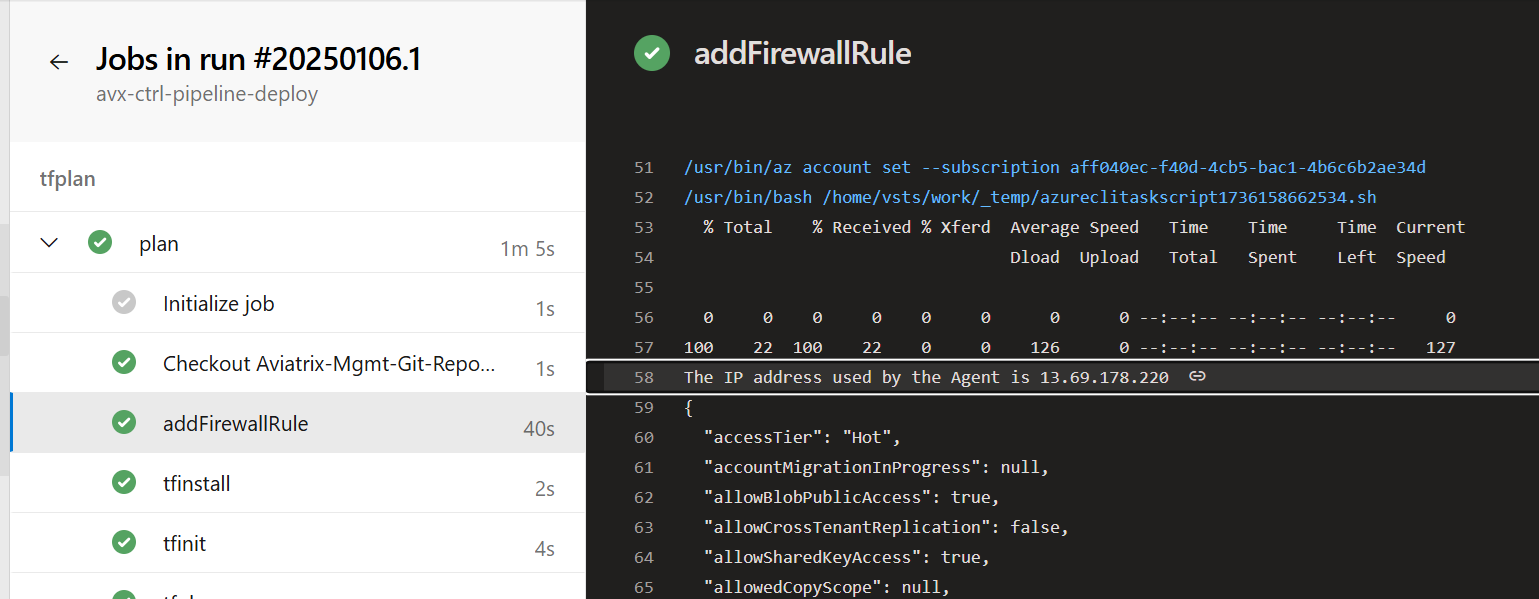
The output that shows the Public IP used by the Agent:
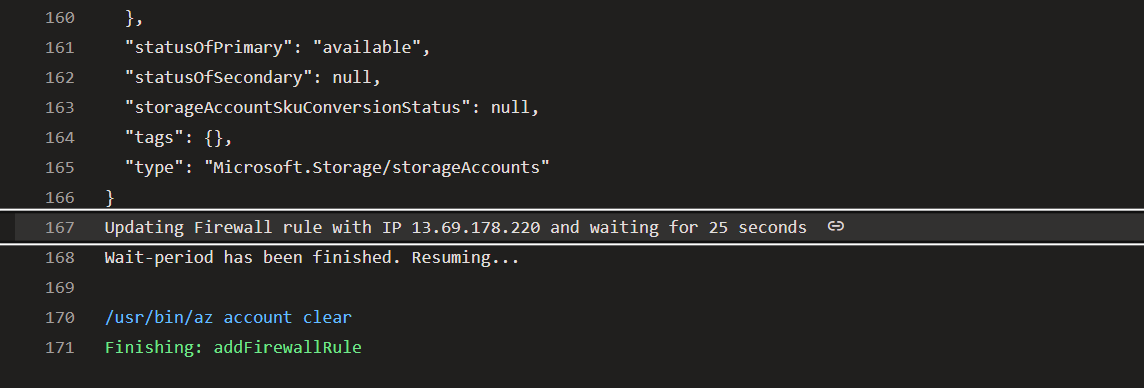
The output when the Network Rule gets added:
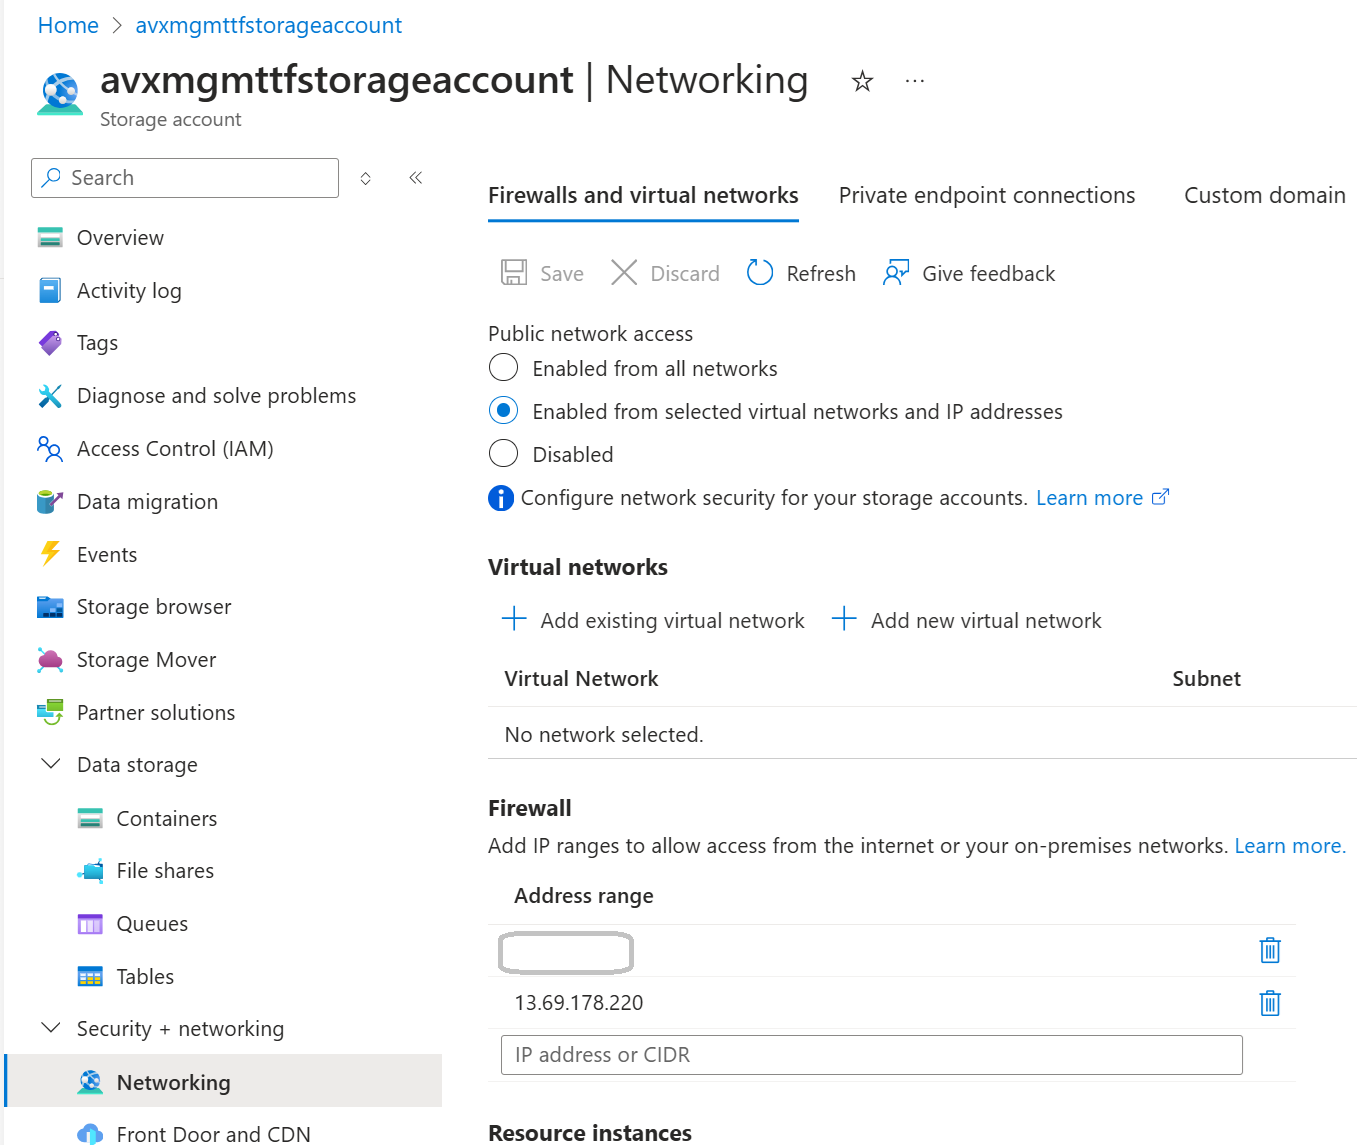
The snapshot from the Azure Portal showing that the Agent’s Public IP has been added (temporarily) to the Firewall Rules:
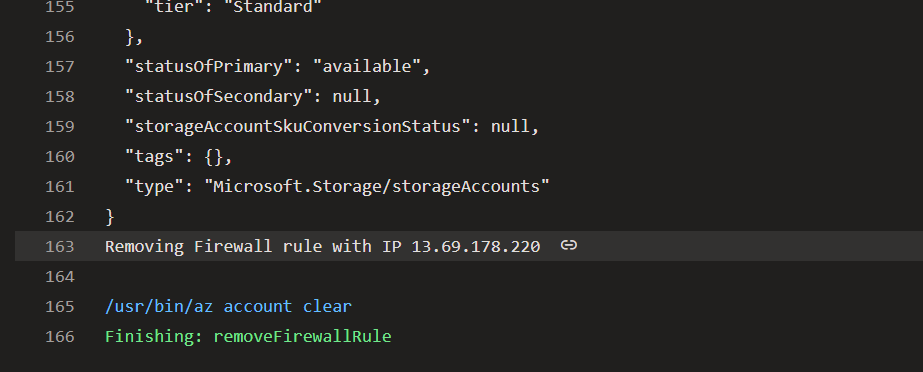
The output when the Network Rule gets removed:
Sleep command
There is one more important thing. I had to add the “sleep” command. It is required to give the Azure API time (after executing the Azure CLI “az storage account network-rule add” command) to update the Azure Storage Firewall Network Rules properly. Without the “sleep” time, the pipeline would usually fail, as the pipeline is much faster than the Azure API. We have to give Azure some time to update the rules.
And why 25 seconds? You could think it is too much. However, based on my tests, everything below 20-25 seconds led (more or less often) to errors in the pipeline. Please notice that even 25 seconds of sleep time is not enough occasionally. If you want to use this approach in the production environment, this could be a significant issue.
The error you would see if your “sleep” time is too short:
│ Error: Failed to get existing workspaces: containers.Client#ListBlobs: Failure responding to request: StatusCode=403 -- Original Error: autorest/azure: Service returned an error. Status=403 Code="AuthorizationFailure" Message="This request is not authorized to perform this operation."
Manual Approval Task
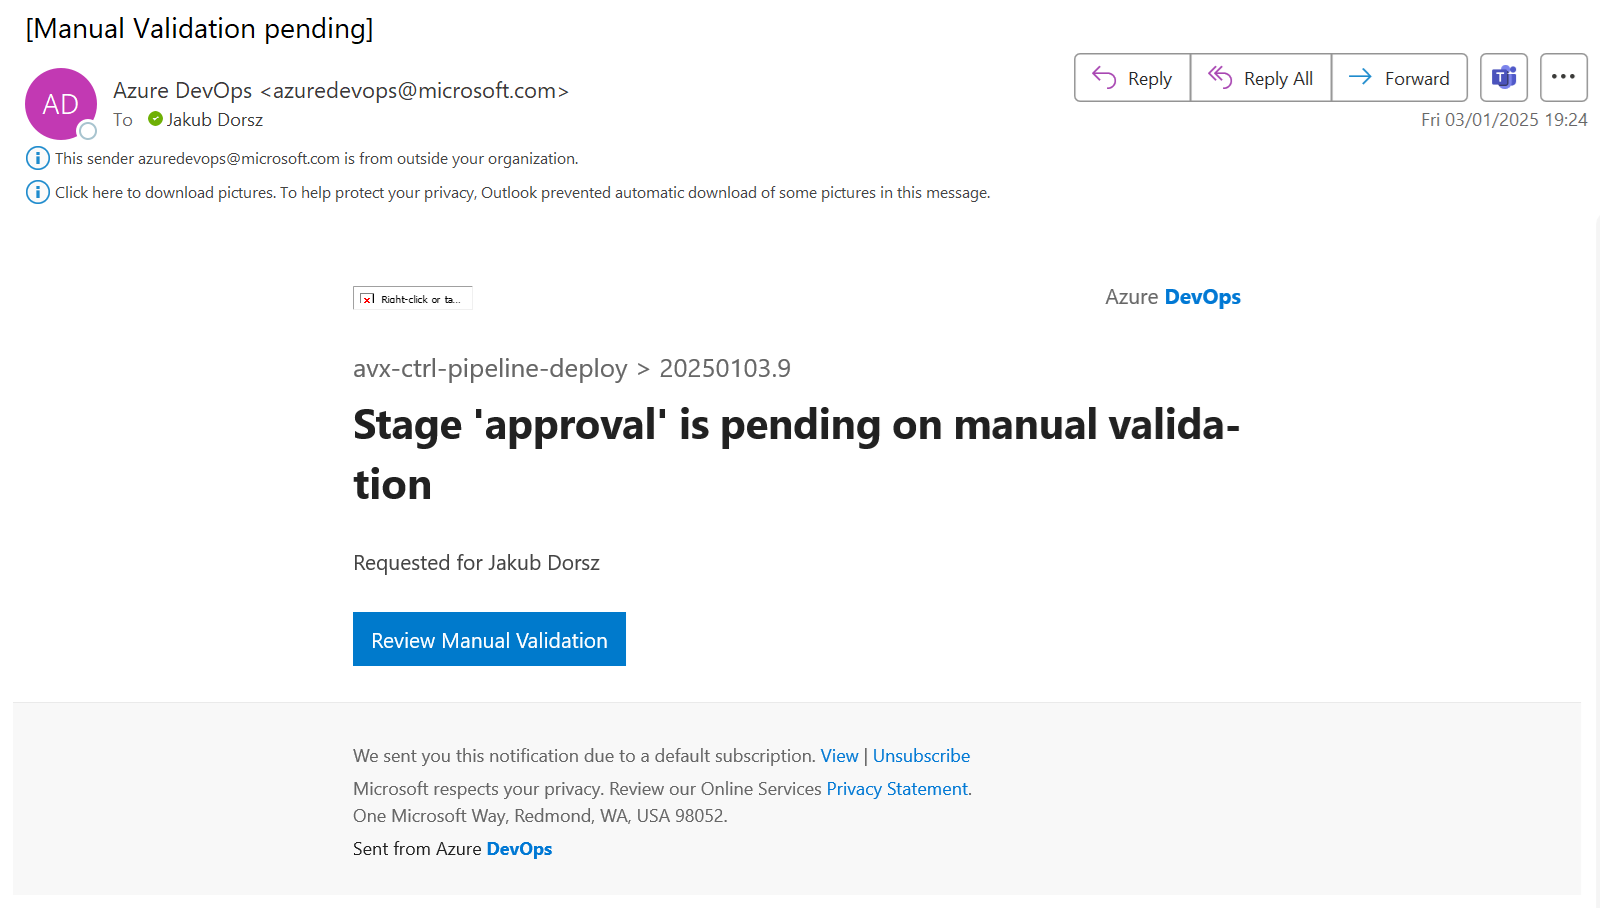
I have decided to use the Manual Approval Task. The administrator will be notified via e-mail that a task is awaiting his/her approval. If the Task is not approved, it will be rejected when the timer expires.
The manual approval stage:
					  - stage: approval
    condition: succeeded('tfplan')
    dependsOn: tfplan
    jobs:
      - job: manualapproval
        pool: server
        steps:
        - task: ManualValidation@1
          inputs:
              notifyUsers: 'your-email@dot.com'
              approvers: 'your-email@dot.com'
              instructions: 'Please Approve'
The Manual Approval e-mail:
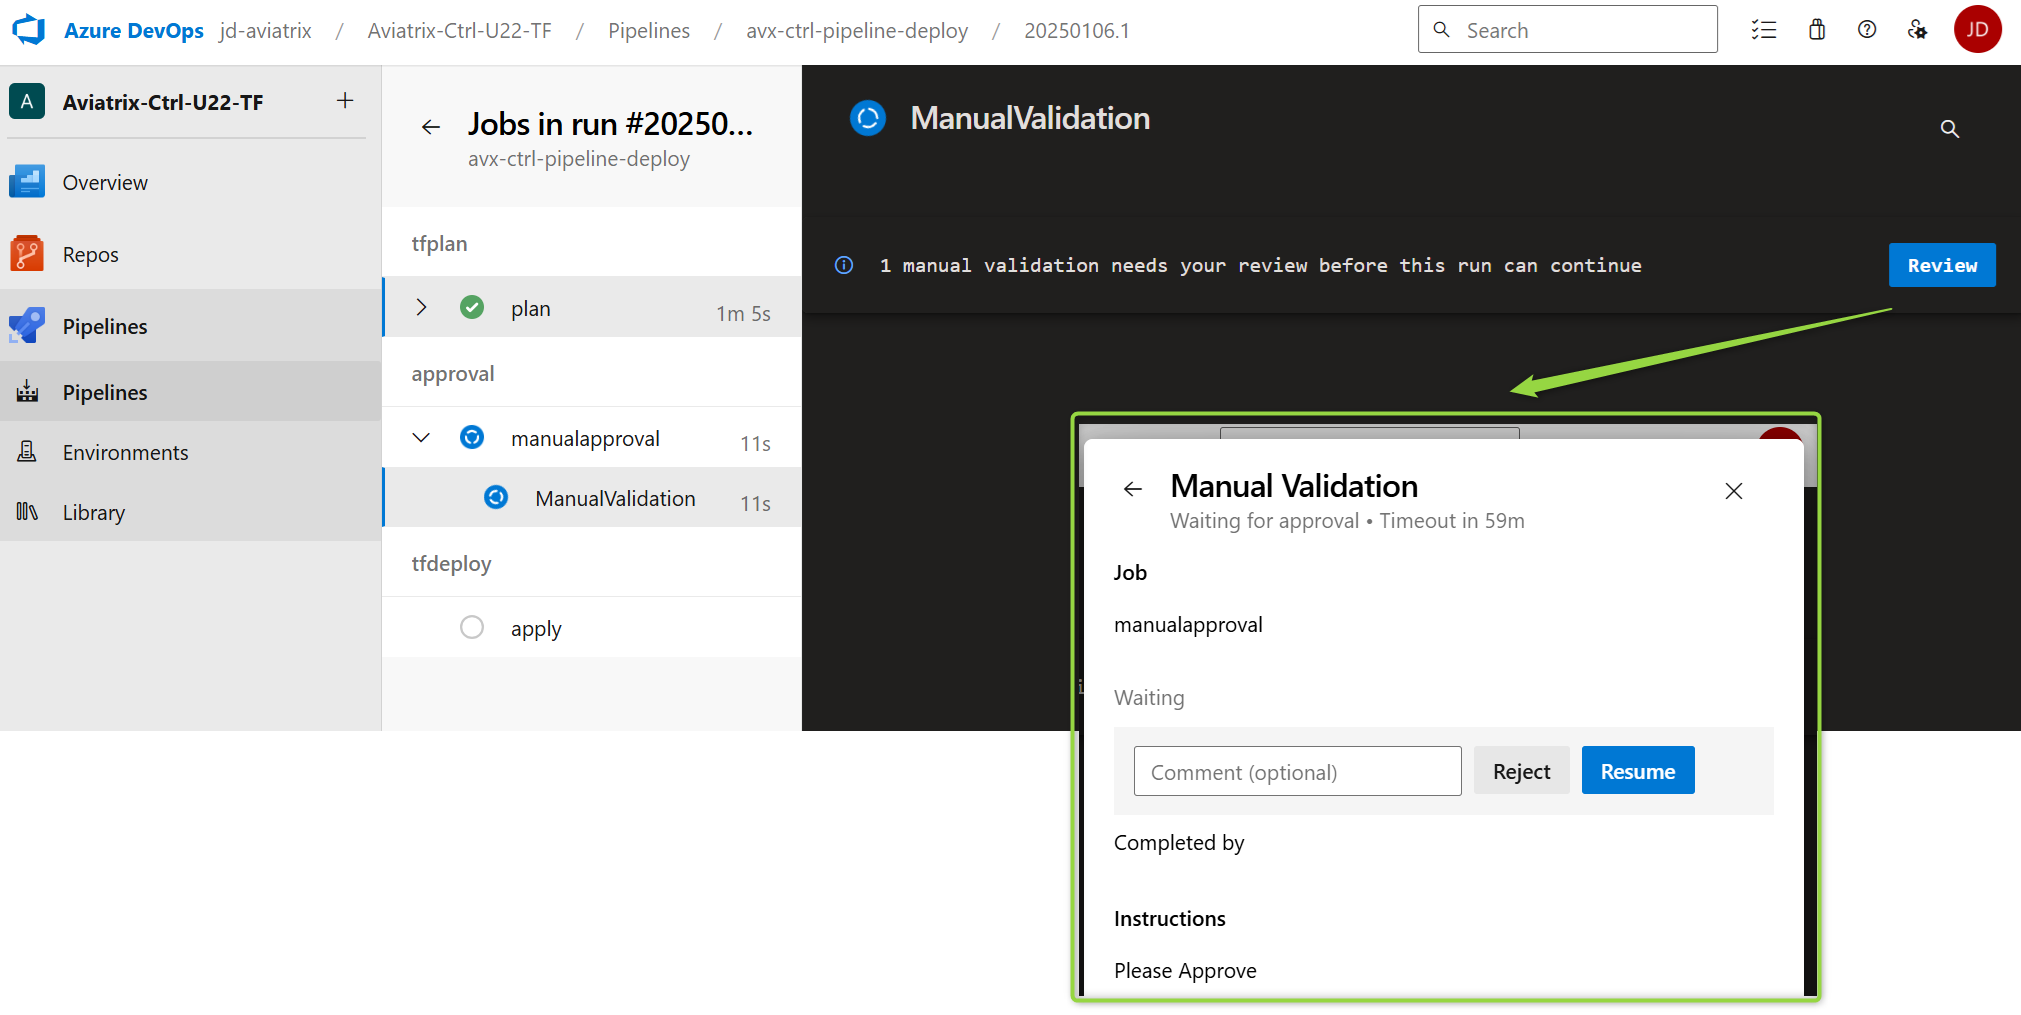
The Manual Approval Task in the Azure DevOps Pipeline:
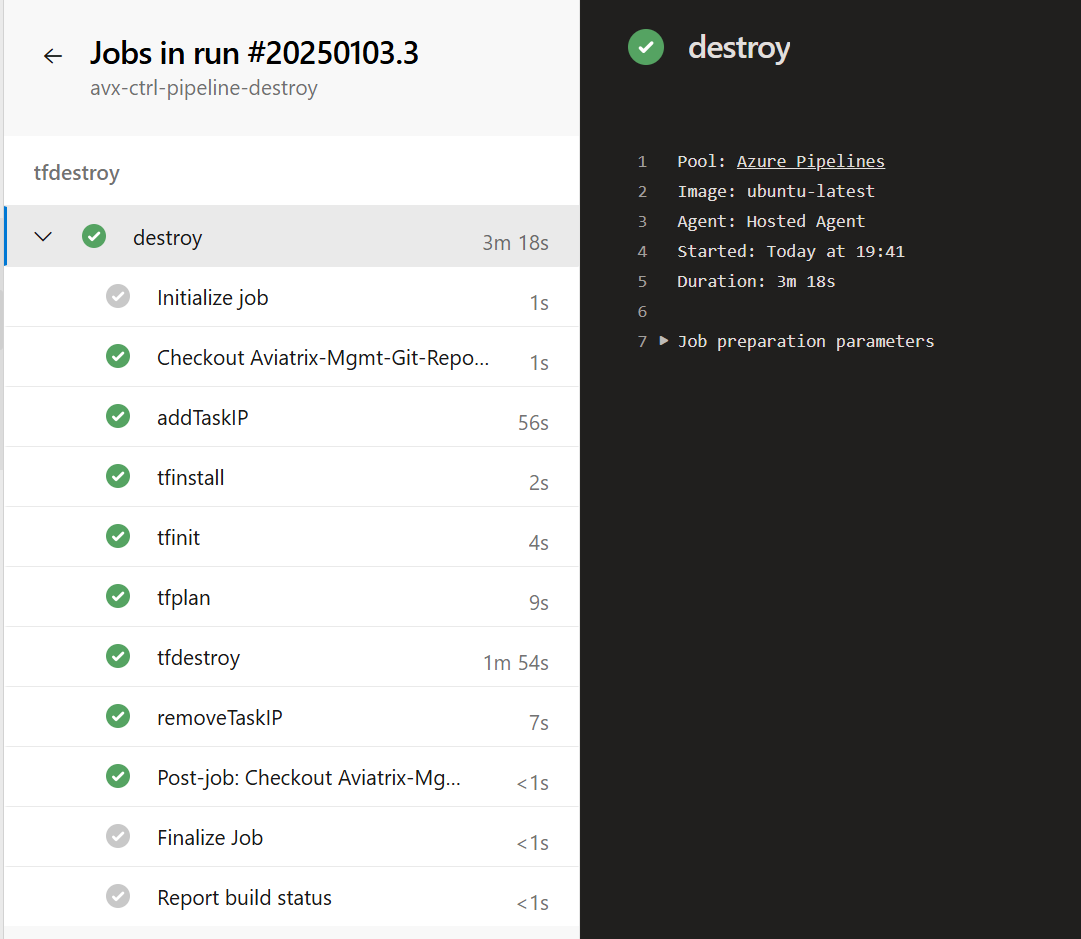
Azure Destroy-Pipeline Structure
The Azure Destroy-Pipeline leverages the same concept as the Deploy-Pipeline when modifying the Azure Storage Firewall Network Rules and “Sleep” command. However, it consists of only one STAGE.
One thing that could be added (it is not there now) is to include the Manual Approval step (the same way the Deploy-Pipeline uses it).
Summary
The pipeline works well. However, as always, there are some spaces for improvement.
The main advantage:
- The Azure Storage Firewall network rules are very restrictive and allow only specific IPs. Moreover, the Agents’ Public IPs are deleted at the end of every Stage.
The main drawbacks:
- The Azure Storage leverages Public Endpoint.
- The pipeline depends heavily on the “sleep” command, which introduces a lot of wait time.
- Regardless of “sleep” time, tasks can fail occasionally.
Update - Part 2 - Using Self-Hosted Agent
How do you create a Self-hosted Azure Pipeline Agent (Ubuntu)? How do you access the Terraform TF State in Azure Storage Container through a Private Endpoint? Let’s find out!
https://cloud-cod.com/index.php/2025/01/10/azure-pipeline-self-hosted-agents-and-azure-storage-for-terraform-state/