Kind (Kubernetes in Docker) lets you run lightweight Kubernetes clusters inside Docker containers. In this post, I’ll show how to provision an AWS EC2 instance with Ubuntu 24.04 LTS, install Docker, kubectl, and Kind, and then create a multi‑node Kind cluster.
Table of Contents
Introduction
I’ve provisioned the following:
EC2 t3.large with the Public IP assigned
Security Group that restricts inbound traffic (allowing only ssh and http/s from my laptop)
VPC with IGW
Kind on EC2 is not a production Kubernetes architecture. Instead, it works best for networking experiments: testing CNIs, ingress controllers, and service meshes in a cloud VM.
AWS just hosts the VM and provides networking; Kubernetes itself runs entirely inside Docker containers managed by Kind.
Installing Docker
Ubuntu 24.04 works well with Docker. You can either use the official Docker repository or Ubuntu’s packages. Here is an installation using the Docker repo:
Kind requires access to Docker without using sudo, so we need to finish configuring the docker group. Do the following steps on the EC2 instance: add the ubuntu user to the docker group (if you haven’t already):
Now we will create a Kind cluster that looks more like a “real” cluster:
1 control‑plane node.
2 worker nodes.
Custom pod and service CIDRs.
Default CNI disabled so you can later install your own CNI (for example, Cilium).
Create kind-config.yaml:
					kind: Cluster
apiVersion: kind.x-k8s.io/v1alpha4
name: aws-kind-demo
networking:
  podSubnet: "10.111.0.0/16"
  serviceSubnet: "10.0.0.0/16"
  disableDefaultCNI: true
nodes:
  - role: control-plane
    extraPortMappings:
      # Map NodePort 30080 on the cluster to host port 80 (HTTP)
      - containerPort: 30080
        hostPort: 80
        protocol: TCP
      # Map NodePort 30443 on the cluster to host port 443 (HTTPS)
      - containerPort: 30443
        hostPort: 443
        protocol: TCP
  - role: worker
  - role: worker
Key fields:
disableDefaultCNI: true disables Kind’s built‑in CNI so that you can install a CNI plugin yourself.
extraPortMappings binds ports on the EC2 host (80, 443) to NodePorts inside the Kind cluster, making it easy to test services from your laptop.
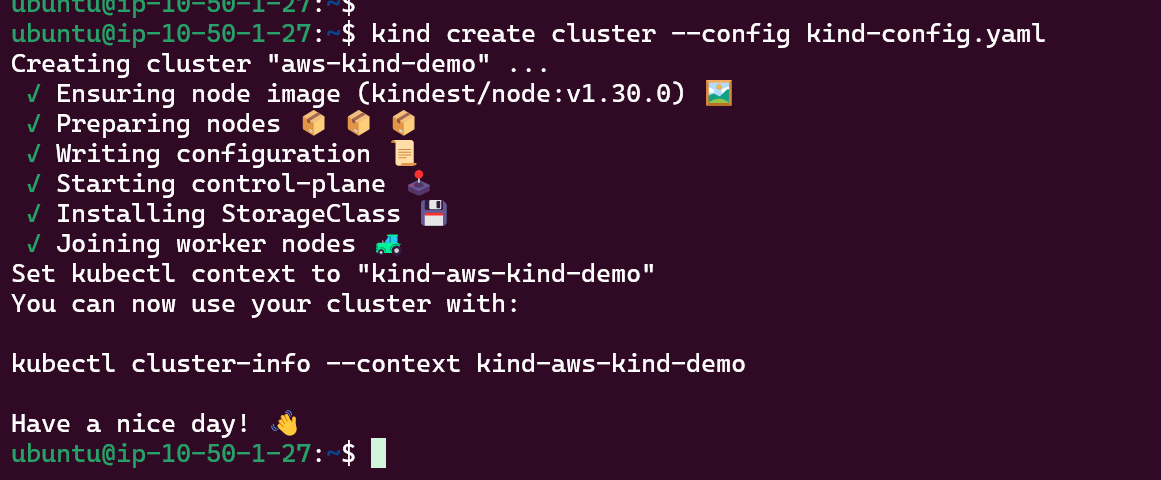
Create the cluster:
kind create cluster --config kind-config.yaml
Cluster creation
Cluster verification
PODs verification
After creating the Kind cluster, you will notice that kube-proxy pods are already running on all nodes. This is expected: Kind installs the standard Kubernetes control plane components, including kube-proxy, even if disableDefaultCNI: true is set in the Kind configuration. The nodes remain in NotReady state because there is no CNI plugin yet, not because of kube-proxy. In the next article, we will install Cilium as the CNI and deploy some test pods and a Service to validate networking end to end.